Robo Saga: Making a "to-do" Discord bot (Robo) with Robo.js
Welcome to the Robo Saga series, where we dive deep into the universe of Robo.js, constructing incredible creations step by step.
Robo.js is like a magic tool for making Discord bots we refer to as "Robos". It's built on Discord.js, which is kind of the engine that powers many Discord bots (again, Robos). But with Robo.js, creating them is way easier and cooler, especially with fun things like plugins!
Before we start, make sure you have:
- A basic understanding of JavaScript or TypeScript
- Node.js or Bun installation on your machine
- A Discord account (a test server would be awesome)
- A code editor (VS Code works wonders!)
Table of Contents
Create a project
Let's get the ball rolling by setting up our Robo project using the create-robo command.
What's a terminal? It's the command center of your computer. If you're on Windows, you've probably seen the Command Prompt.
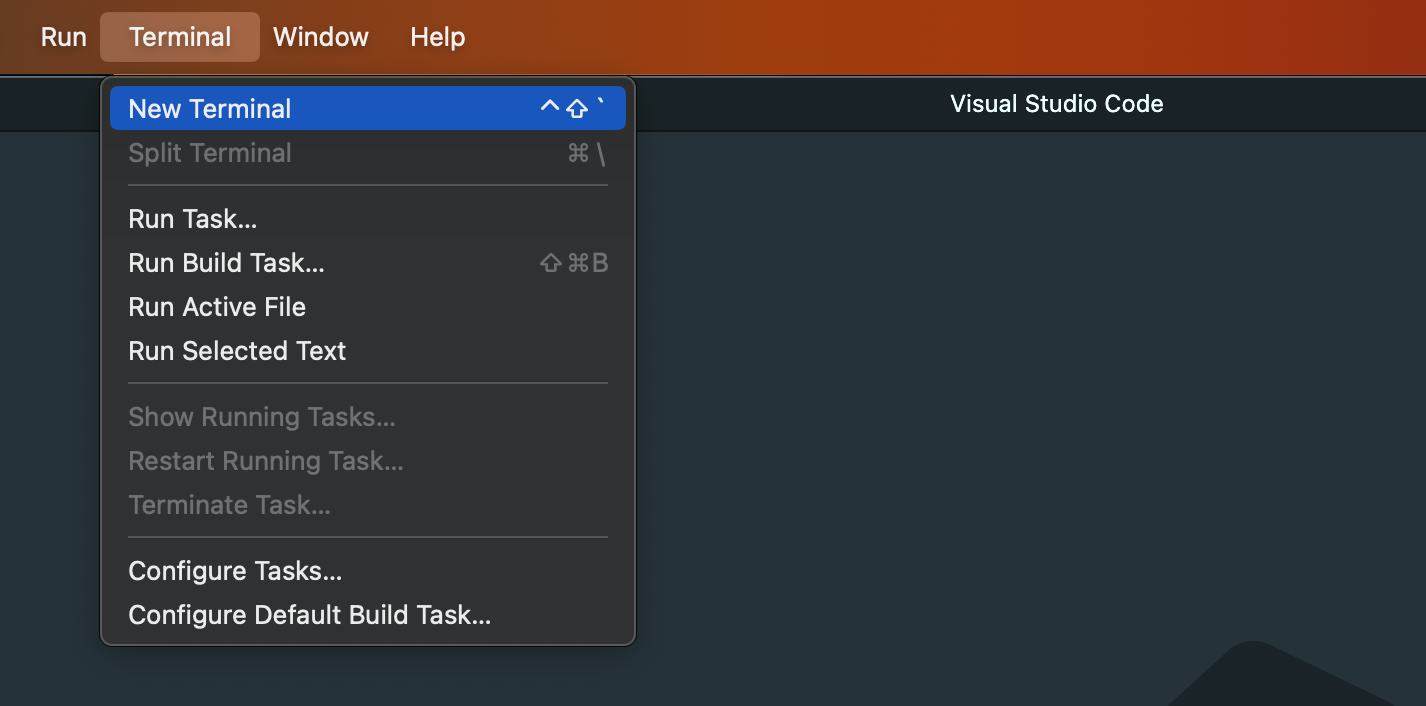
If you're using VS Code:
- Open VS Code.
- At the top, navigate to
Terminal. - Choose
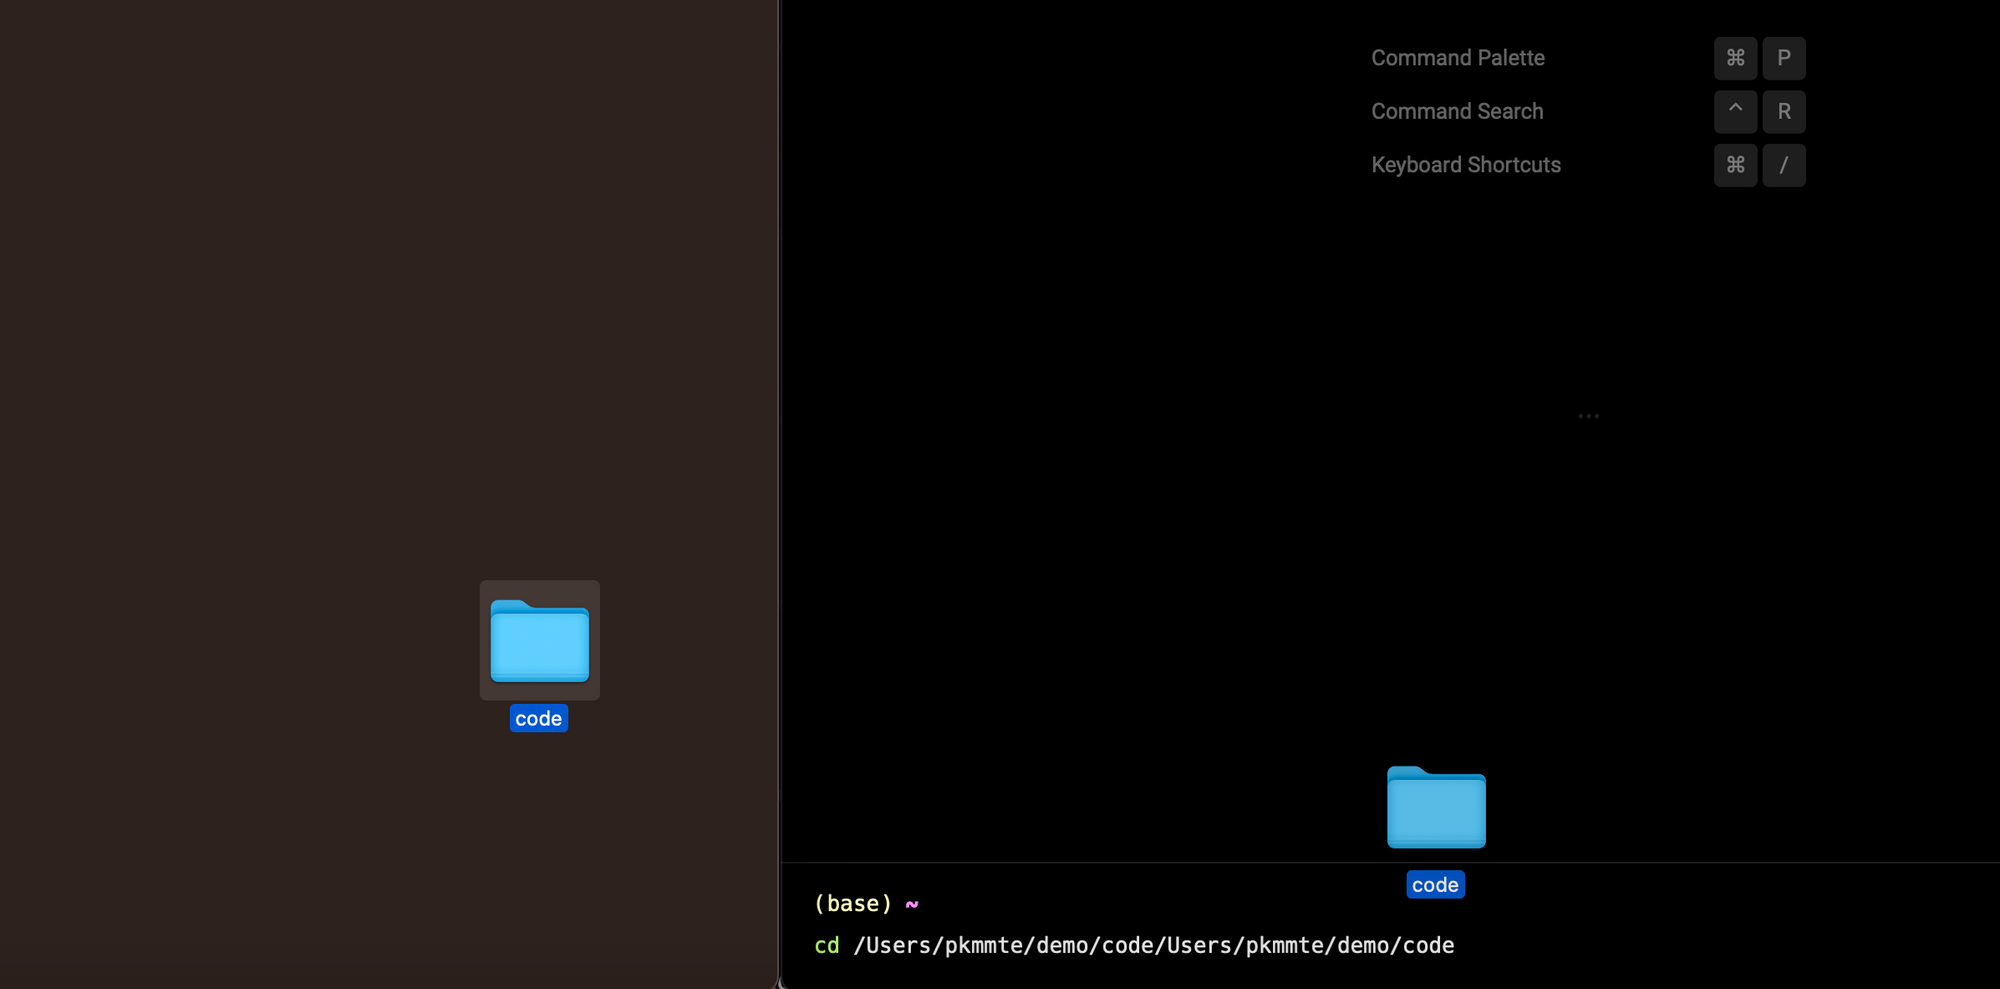
New Terminal. This pops open a terminal at the bottom of your VS Code window. - To navigate to the folder where you want to create your Robo project, use the
cd(change directory) command. A handy trick: you can drag and drop the folder into the terminal, and it'll auto-fill the path for you!
If you're not using VS Code:
- Open your computer's terminal or Command Prompt.
- Use the
cdcommand to move to the directory where you want to establish your Robo project. Remember the drag-and-drop trick? It works here too, for most terminals!
Now, regardless of your approach:
- Type
npx create-robo <YourRoboName>in your terminal and hit Enter. For this tutorial, we're using VS Code but the concept is the same. - This tool will walk you through a few customization steps, and generate a project template. This saves a lot of time!

Get Your Discord Bot Token
Near the end of setting up, you'll need a token. This token is like a special key that lets your bot work on Discord.
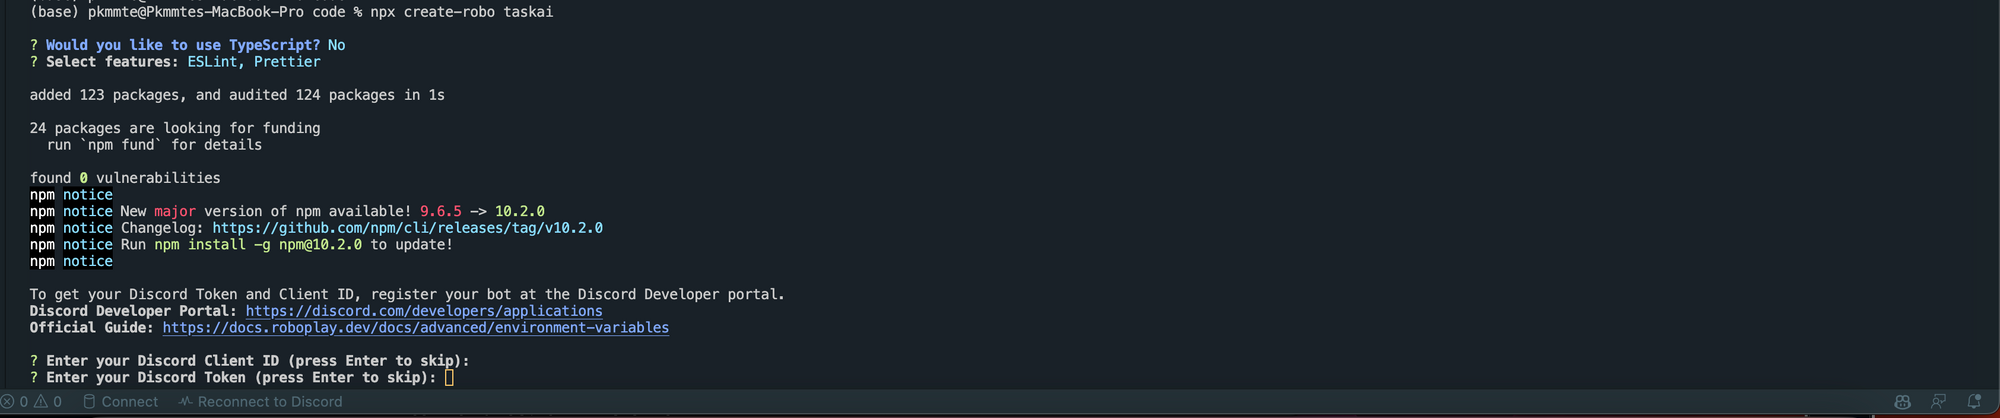
To get this token:
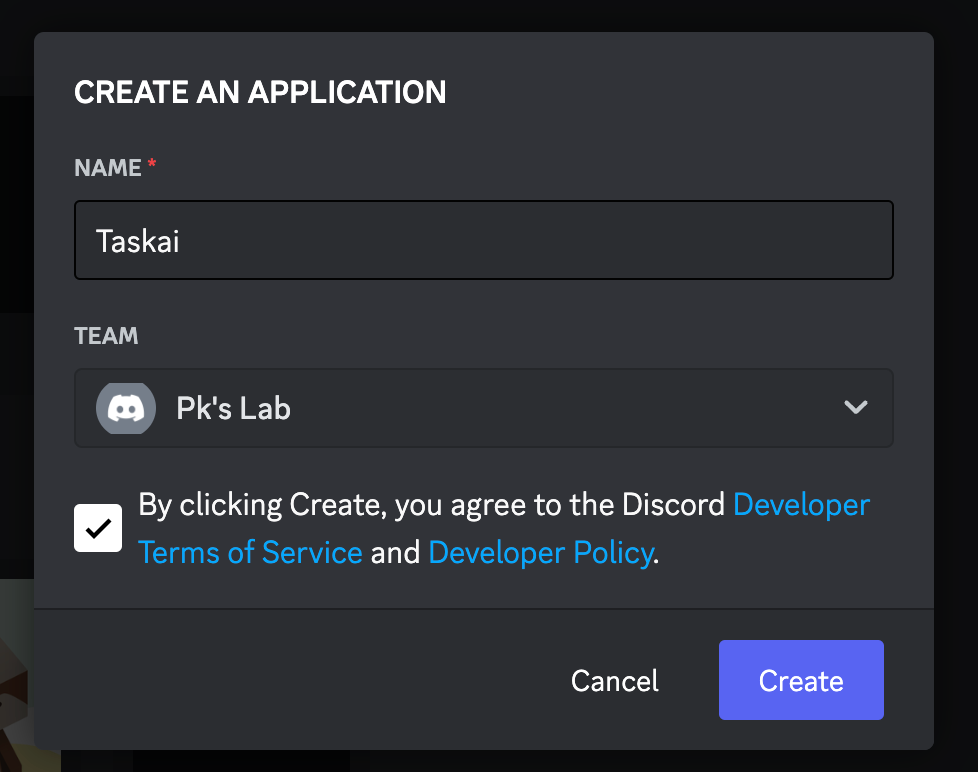
1. Go to the Discord Developer Portal.
2. Make a new application and remember the 'APPLICATION ID'.

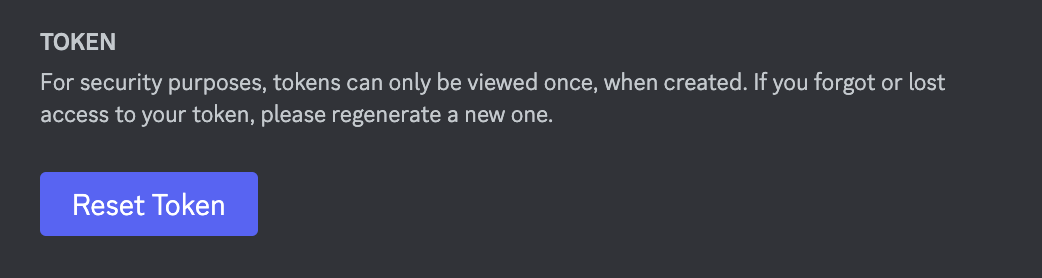
3. Click on the 'Bot' tab, then copy your token. If you don't see it, click "Reset Token".
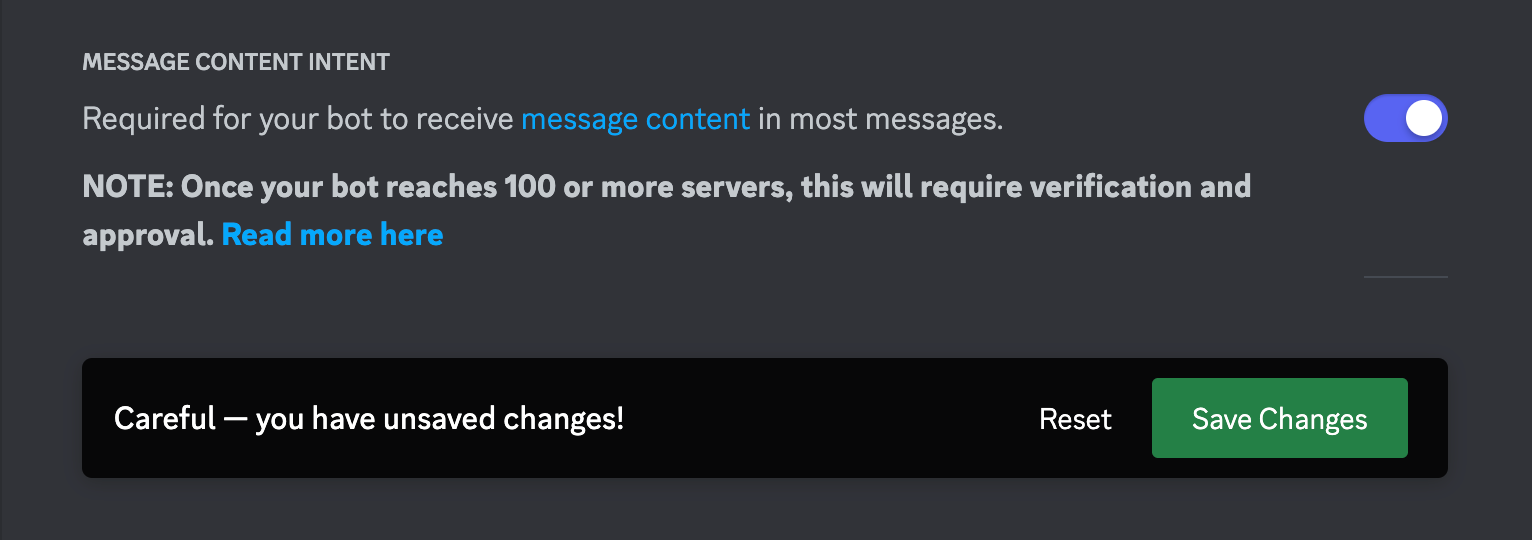
4. Also, turn on the 'Message Content' option in the 'Bot' section and save.
5. Enter the Discord Client ID and Bot Token we got into the terminal. Congrats, you now have a working Robo project!
Now just open the new folder in your code editor and you're good to go!
For those not using VS Code: don't forget to cd <YourRoboName> into the new project after this. Your terminal's working directory needs to be set to the new project folder we just created. Add it to Your Discord Server
With your token ready, let's get your bot into your Discord server.
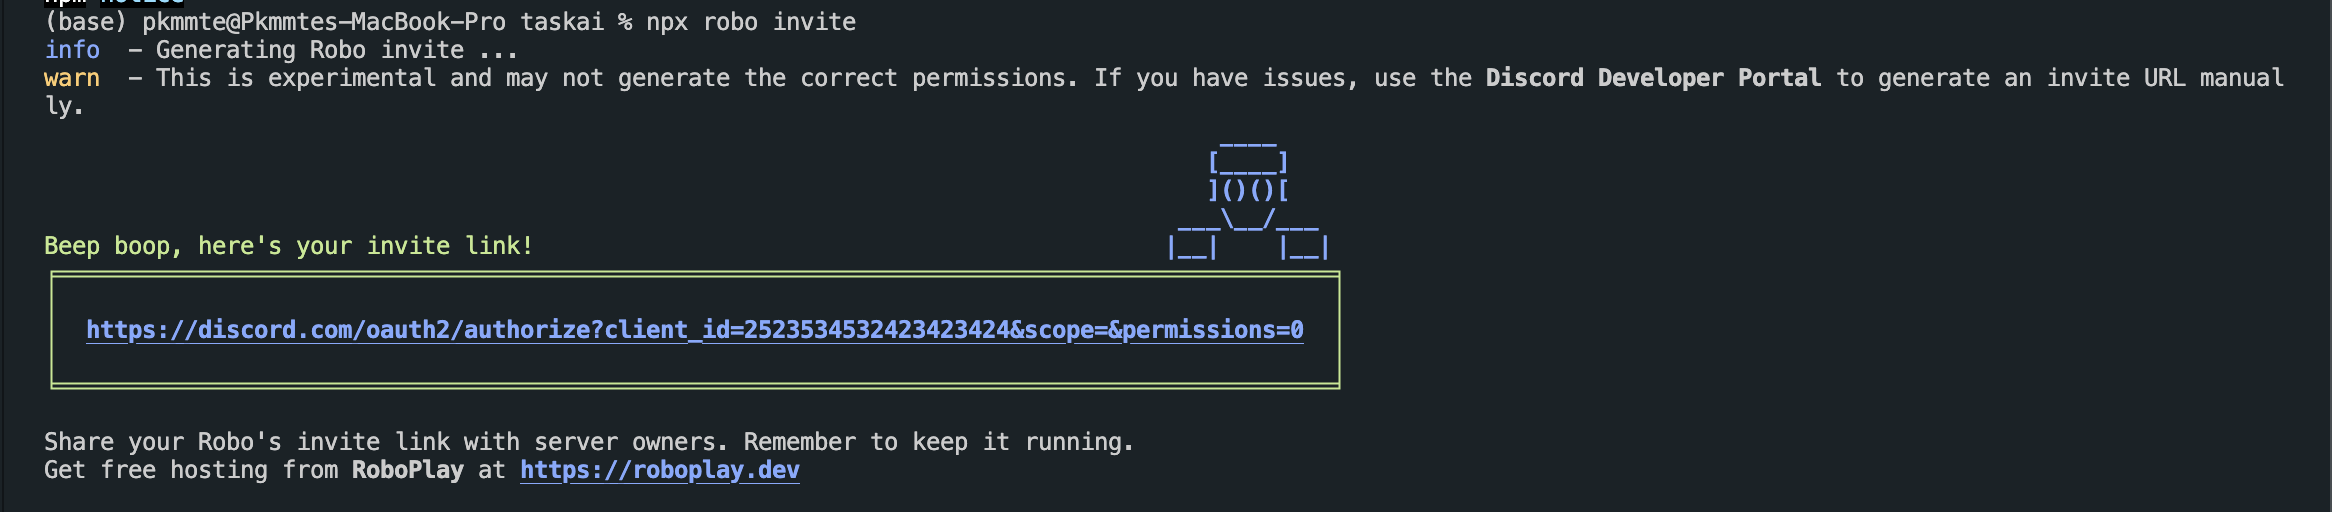
Type npx robo invite in your terminal. This gives you a link. Click on it, and you can add your Robo to a server. Or, you can use the 'OAuth' section in the developer portal. For more details, check here.
Understand the basics
Slash commands are the simplest way users talk to your Robo in Robo.js. It's not just about commands, though. You can do other neat stuff like joining voice chats, noticing when a user does something (events), and more, such as context commands.
The Robo File Structure
With Robo.js, adding features is about putting files in the right place. This system is called the Robo File Structure. When you made your project, there was a sample command called /ping. Let's change that to our needs by renaming ping.js to todo-add.js.
Let's also create files named todo-remove.js and todo-show.js. They'll help users remove and view items on a to-do list.
For now, these files can contain:
export default () => {
  return 'todo'
}
These slash commands are simple JavaScript functions. Your Robo's response? It's whatever your function returns!
Running Your Robo
Now that commands are set up, let's start your Robo. In your terminal, enter npx robo dev. Your Robo is now active and will reply with "todo" when the commands are used. It's aliveee!
Making it do stuff
Your Robo has one mission: to assist users in keeping track of their tasks. Time to give those slash commands the power they deserve!
Adding tasks with command options
For our /todo-add command, we want to save a task. And to do this, we'll need a description of that task from the user. This is where "command options" come into play. Thanks to Discord, inputting data is a breeze.
In your slash command, simply export a variable named config. Within it, include an array titled options. Each item in this array should be an object with a name and description, informing users what they're supposed to input:
export const config = {
  description: 'Save a task for later',
  options: [
    {
      description: 'The task description to save',
      name: 'task',
      required: true
    }
  ]
}

export default (interaction) => {
  const task = interaction.options.get('task')?.value
  return 'Saving task: ' + task
}
The magic happens in the command's default function. The interaction.options.get('task')?.value code snippet fetches the value of the task option for us, returning a string by default.
Remember, the interaction here is an instance of the Discord.js CommandInteraction. It's automatically fed into your command file every time the command is executed. And trust us, it’s packed with capabilities waiting to be unlocked!
Saving task data
To manage our tasks, we need a centralized place to store them. Enter the constants.js file:
// This is where we will be saving tasks for now
// We can now import the `tasks` in other files and reference the same data
export const tasks = [];
Create this constants.js file within the src directory. Don't worry about its simplistic name; while Robo.js has a special structure for certain features, the rest of your project layout is up to you. Just avoid special directories like commands, context, events, and robo.
Let's integrate this storage into our /todo-add command:
import { tasks } from '../constants.js';

export const config = // ... the config object from before

export default (interaction) => {
  const task = interaction.options.get('task')?.value;
  tasks.push(task);  // Save the task
  return 'Successfully saved task!';
}
Now, with our saving mechanism in place, we can proceed to display or remove tasks.
Showing tasks
When users have saved tasks, it's only natural that they'd want to view them at some point. The /todo-show command is our way to showcase these saved tasks.
In the todo-show.js file, first, let's import our saved tasks:
import { tasks } from '../constants.js'
Now, for the command itself:
export default (interaction) => {
  if (tasks.length === 0) {
    return 'You have no tasks saved!';
  }

  const taskList = tasks.map((task, index) => `${index + 1}. ${task}`).join('\n');
  return `Your tasks are:\n${taskList}`;
}
Here's the breakdown:
- If there are no tasks, it immediately informs the user that their task list is empty.
- If tasks are present, we're using the
.map()function to format each task with its number and then joining them together with line breaks using.join('\n'). It makes the task list more readable!
Removing tasks
Now, if users can add tasks, they should be able to remove them too. The /todo-remove command handles this.
Let's start with our command configuration. We want to let the user specify which task number they wish to remove:
export const config = {
  description: 'Remove a task from your list',
  options: [
    {
      description: 'Number of the task to remove',
      name: 'task_id',
      type: 'integer'
    }
  ]
}
The type: 'integer' bit ensures users provide a number for the task they wish to remove.
Now, the command:
import { tasks } from '../constants.js'

export default (interaction) => {
  const taskNumber = interaction.options.get('task_id')?.value;

  if (!taskNumber || taskNumber > tasks.length || taskNumber < 1) {
    return 'Please provide a valid task number!';
  }

  const removedTask = tasks.splice(taskNumber - 1, 1);
  return `Removed task: ${removedTask[0]}`;
}
A quick explanation:
- We get the task number provided by the user.
- If the number is invalid or out of range, we alert the user.
- We use the
.splice()method to remove the task from the array. Since this method returns an array of the removed items, we take the first element as our removed task.
Wrapping Up
You, dear reader, have just breathed life into a personal task-tracking bot. The vast world of Robo.js awaits you, filled with endless opportunities. Forge on, and let your Robo.js journey be legendary!